The Year of Plenty is giving us a lot of opportunities that I didn’t anticipate when we first started. One of those is giving my time to things that I’ve always wanted to do but never felt like I had time for. We’re definitely busier in a lot of ways (working on weekends, Elaine has been traveling more, etc.). But being home has opened up some possibilities for doing things that have always intrigued me. The first “hobby” that I picked up when we started this journey is baking sourdough bread.
Making sourdough scratches a lot of different “itches” for me. First, and most obvious: it’s freaking delicious. I’ve always loved sourdough bread, but I’ve never had any artisan style sourdough. By that I mean made fresh, with real ingredients. Second, it’s a little bit science-y. When I first decided to give this a shot, I wanted to see the process through from start to finish. That meant making my own starter. This takes a little dedication and time. But the fact is that making my own starter brought its own unique satisfaction. Using two basic ingredients (flour and water), I picked up bacteria and wild yeast from the air, and was able to use that as the rising agent in my own bread! It’s almost like magic. Third, it’s a way to use my hands in a way that I don’t often get to. I’m an introvert, and always concerned with gaining lots of knowledge, so I’m in my head a ton. For all you Enneagram nerds, I’m a type five. But making bread gives me a chance to take real, tangible things and make something that brings joy to my family and to friends I share it with.
If you’re interested in my process, here’s the basic form of what I do. At the bottom of the post, I’ll also link to a couple of resources that taught me a lot about making and maintaining a starter, making your first loaf, troubleshooting, and so on.
Day 1 (evening)
Using a mature starter that has a steady rise-and-fall every day, feed your starter as normal. Set aside on your counter until morning.
Day 2 (all day)
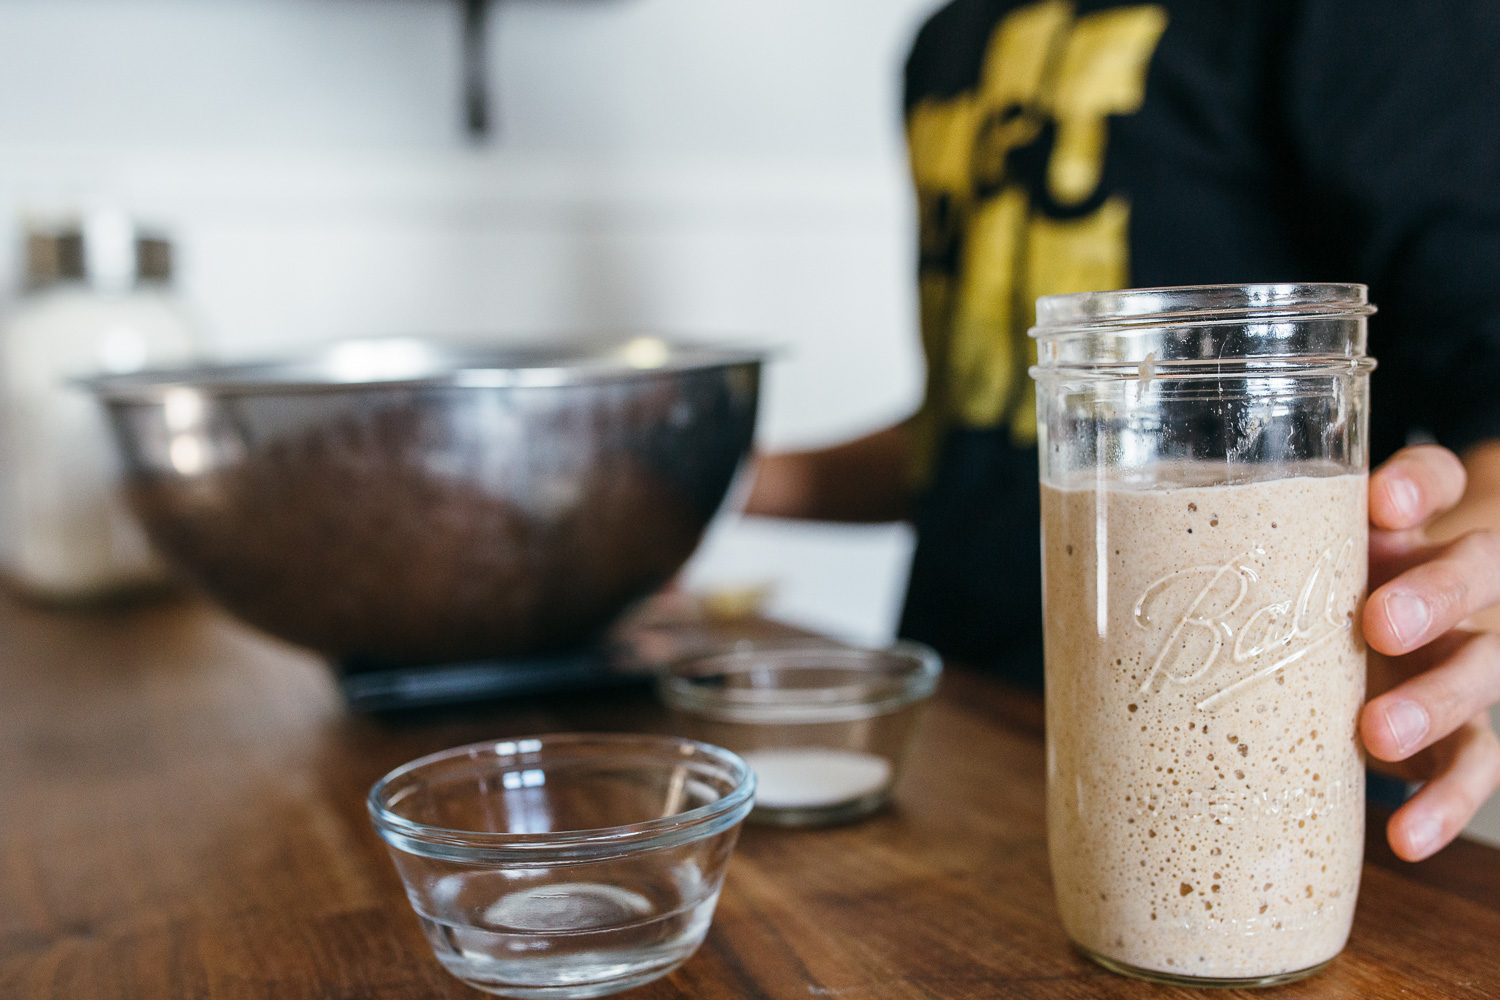
- 8 AM – Feed your starter again. You’ll need a total of 200 grams of starter for the dough later. Normally, I carry over about 50 grams of starter, feed it 60 grams of AP flour, 60 grams of whole wheat flour (I prefer King Arthur), and 120 grams of room temp water. Let the starter do its thing. (This is sometimes called the “levain,” pronounced leaven. The reality is, a levain is no different than an offshoot of your starter.)
- ~12 PM – This is the step called “autolyse.” When your starter is ready (roughly 4-6 hours after feeding it in the morning), you can mix the large portion of your dough. For me, this is 700 grams of bread flour (again, I prefer King Arthur), 300 grams of whole wheat flour, and 700 grams of water. Mix this together, and let this sit for an hour under a damp towel in a large mixing bowl.
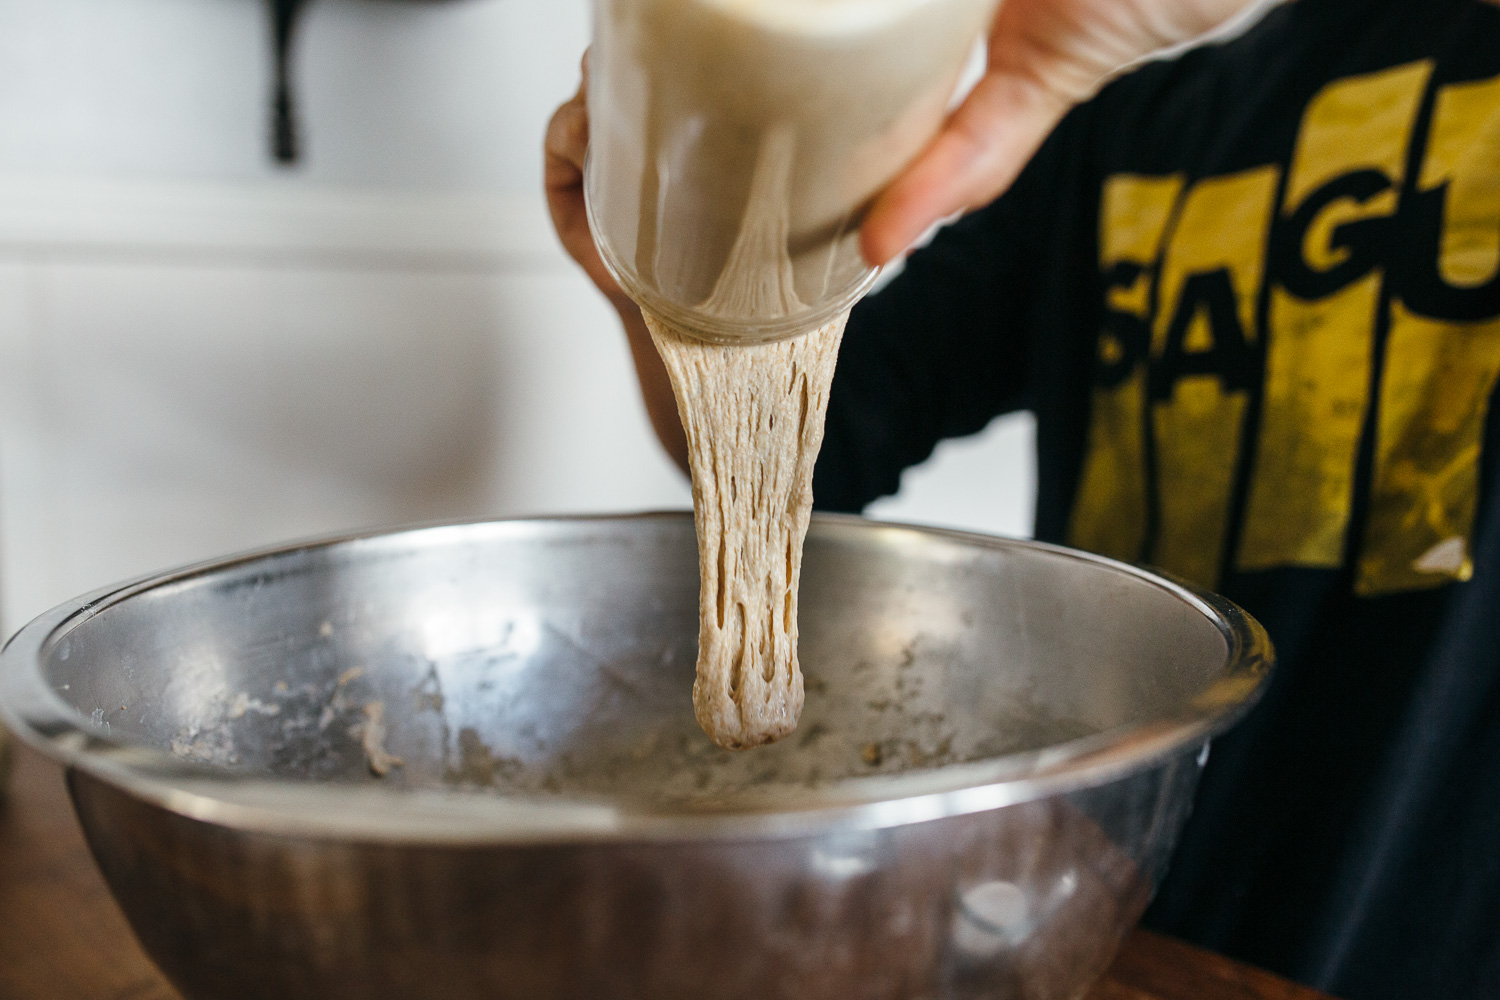
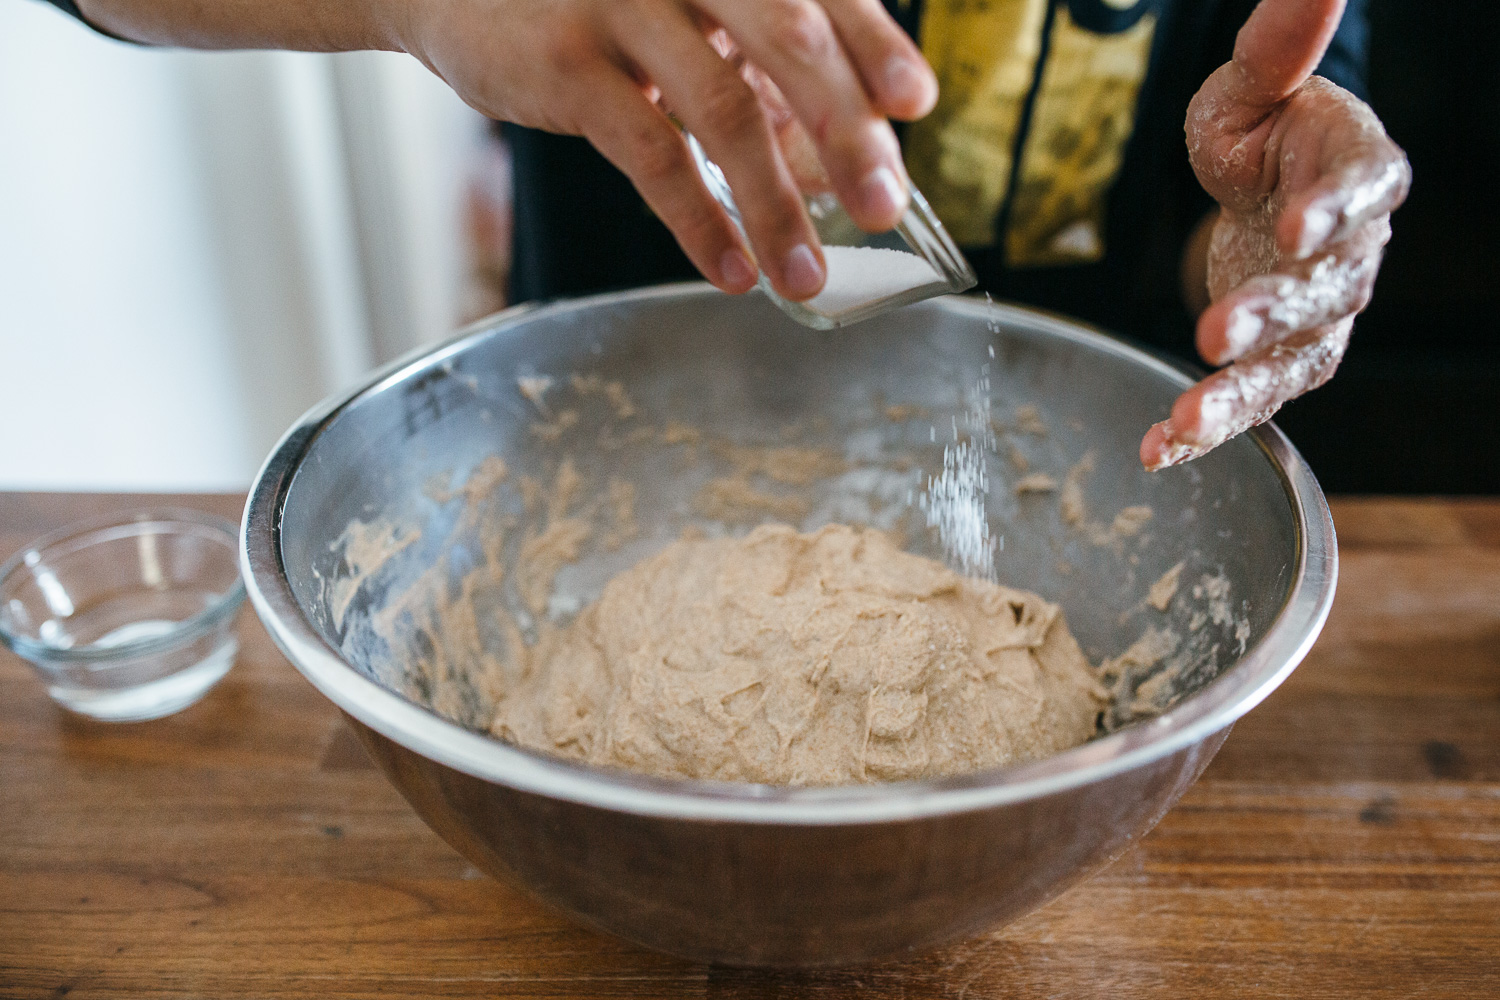
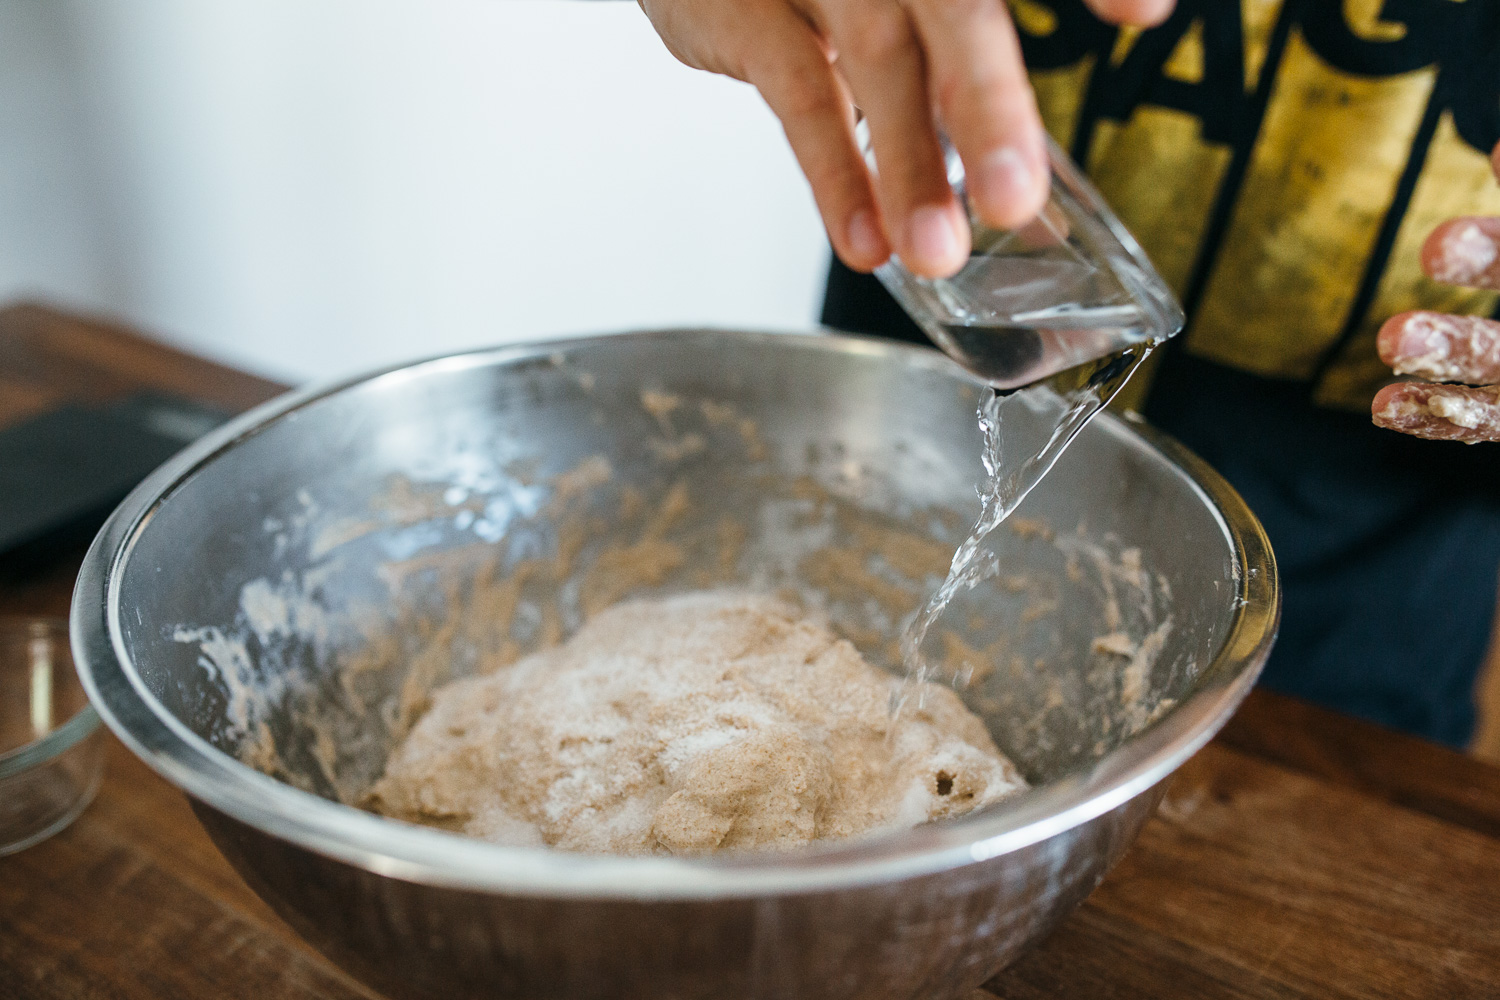
- ~1 PM – If your starter is ready (there are lots of ways to test this — the “float test” is something you can Google, although I don’t follow this rule all the time), transfer 200 grams of your starter to your dough. Using a pinching motion, combine the dough and the starter together. After the starter is fully incorporated into the dough, add 50 grams of water and 20 grams of kosher salt. Mix together by hand. The dough will likely be pretty wet.
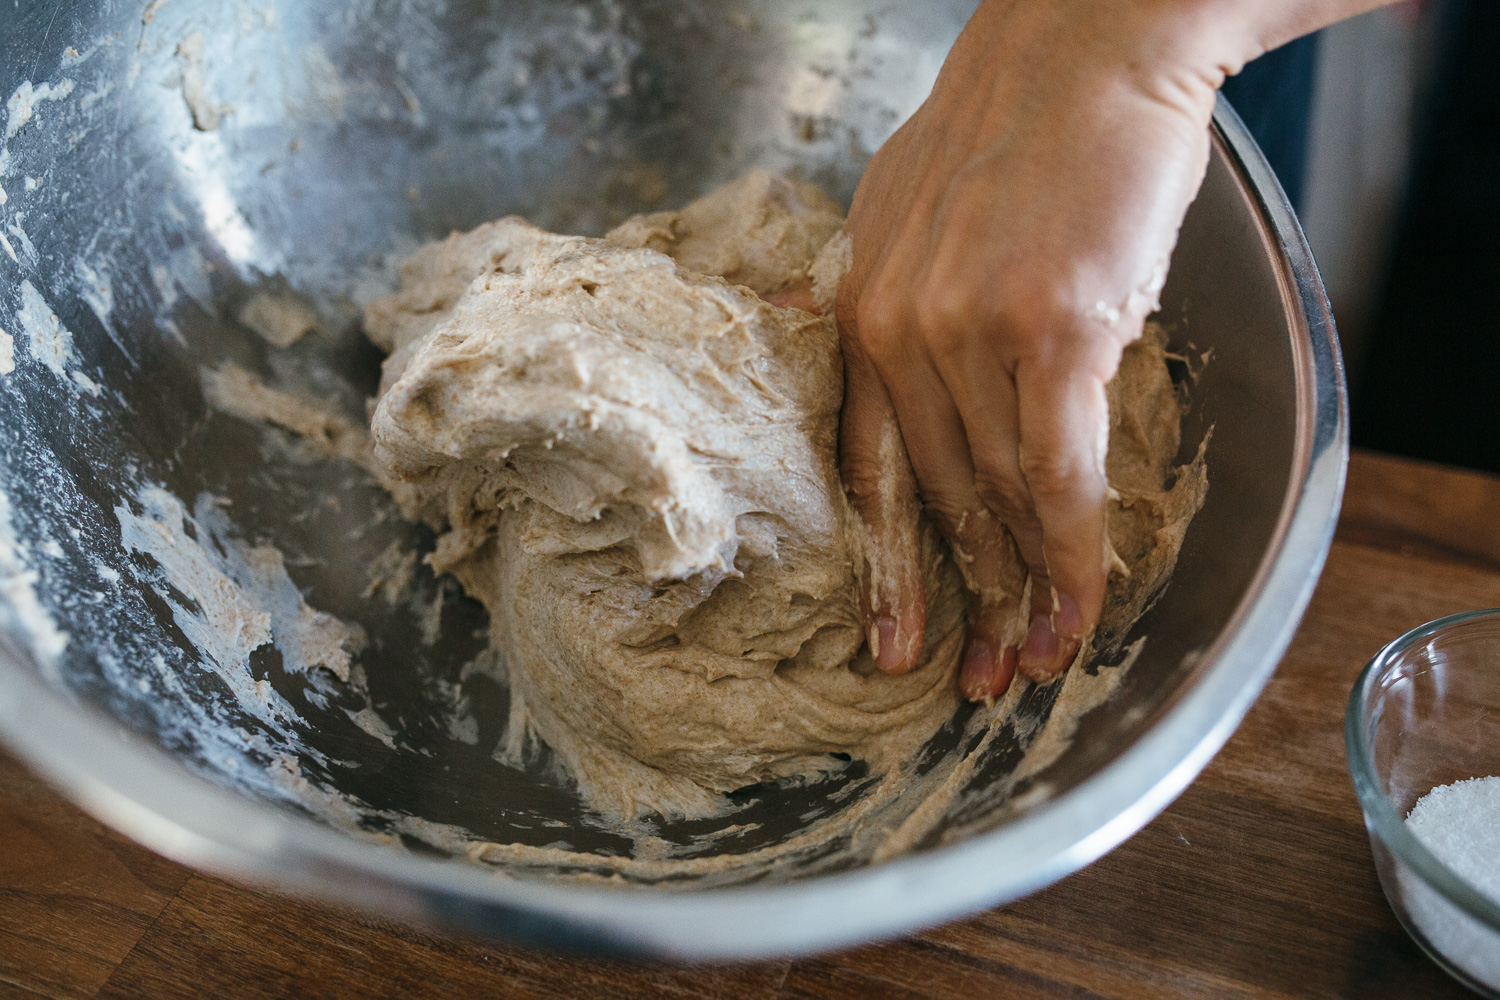

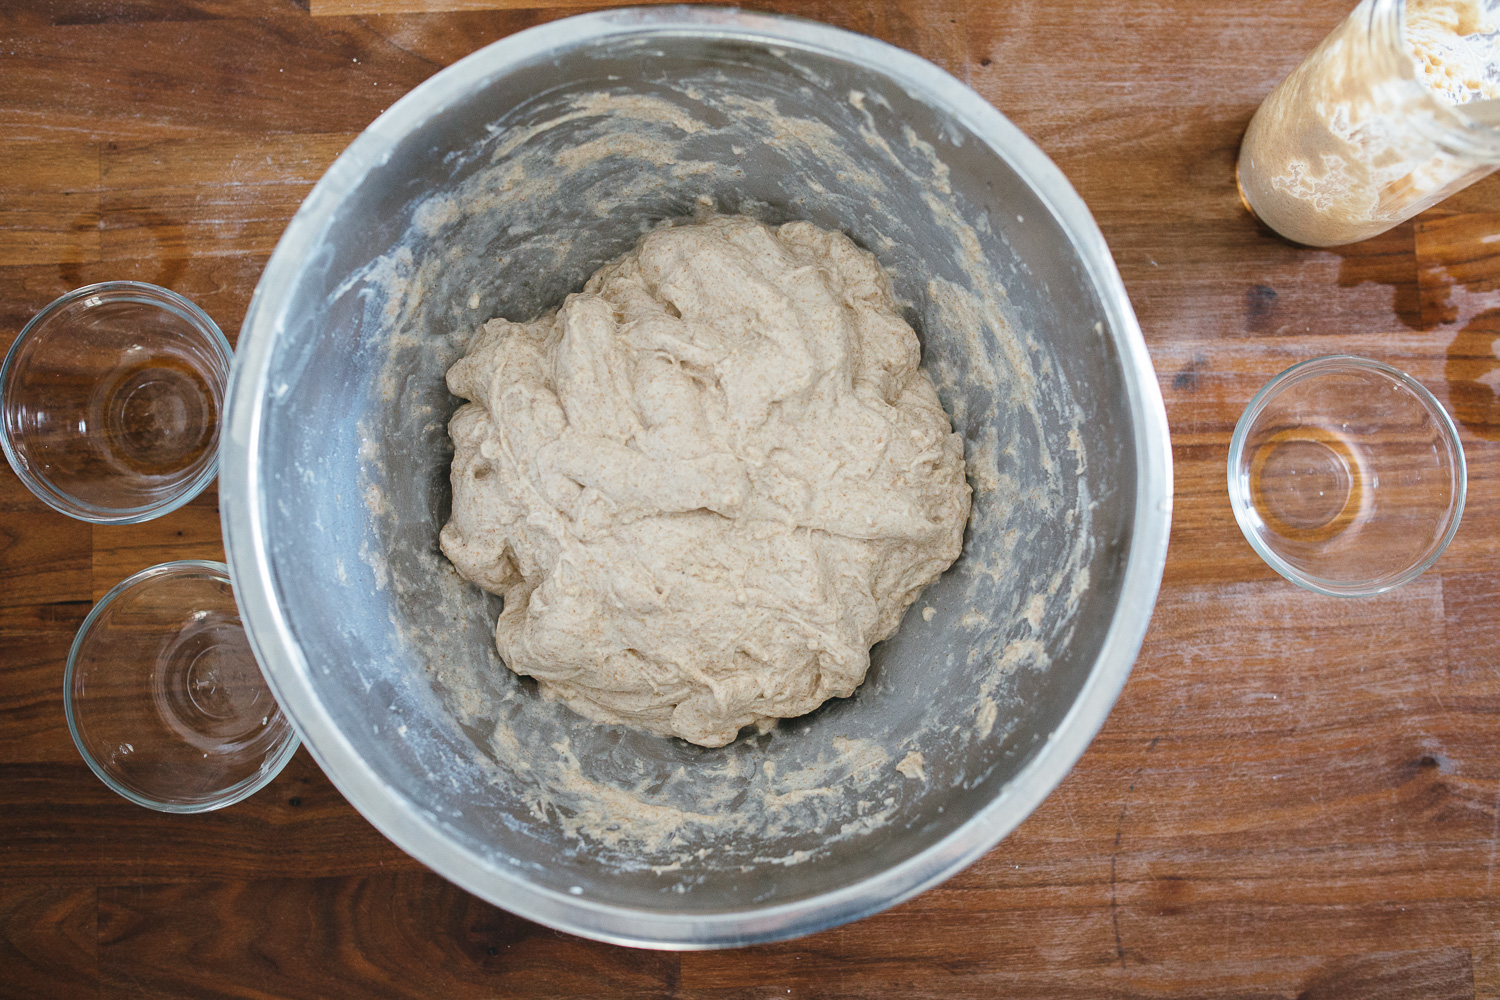
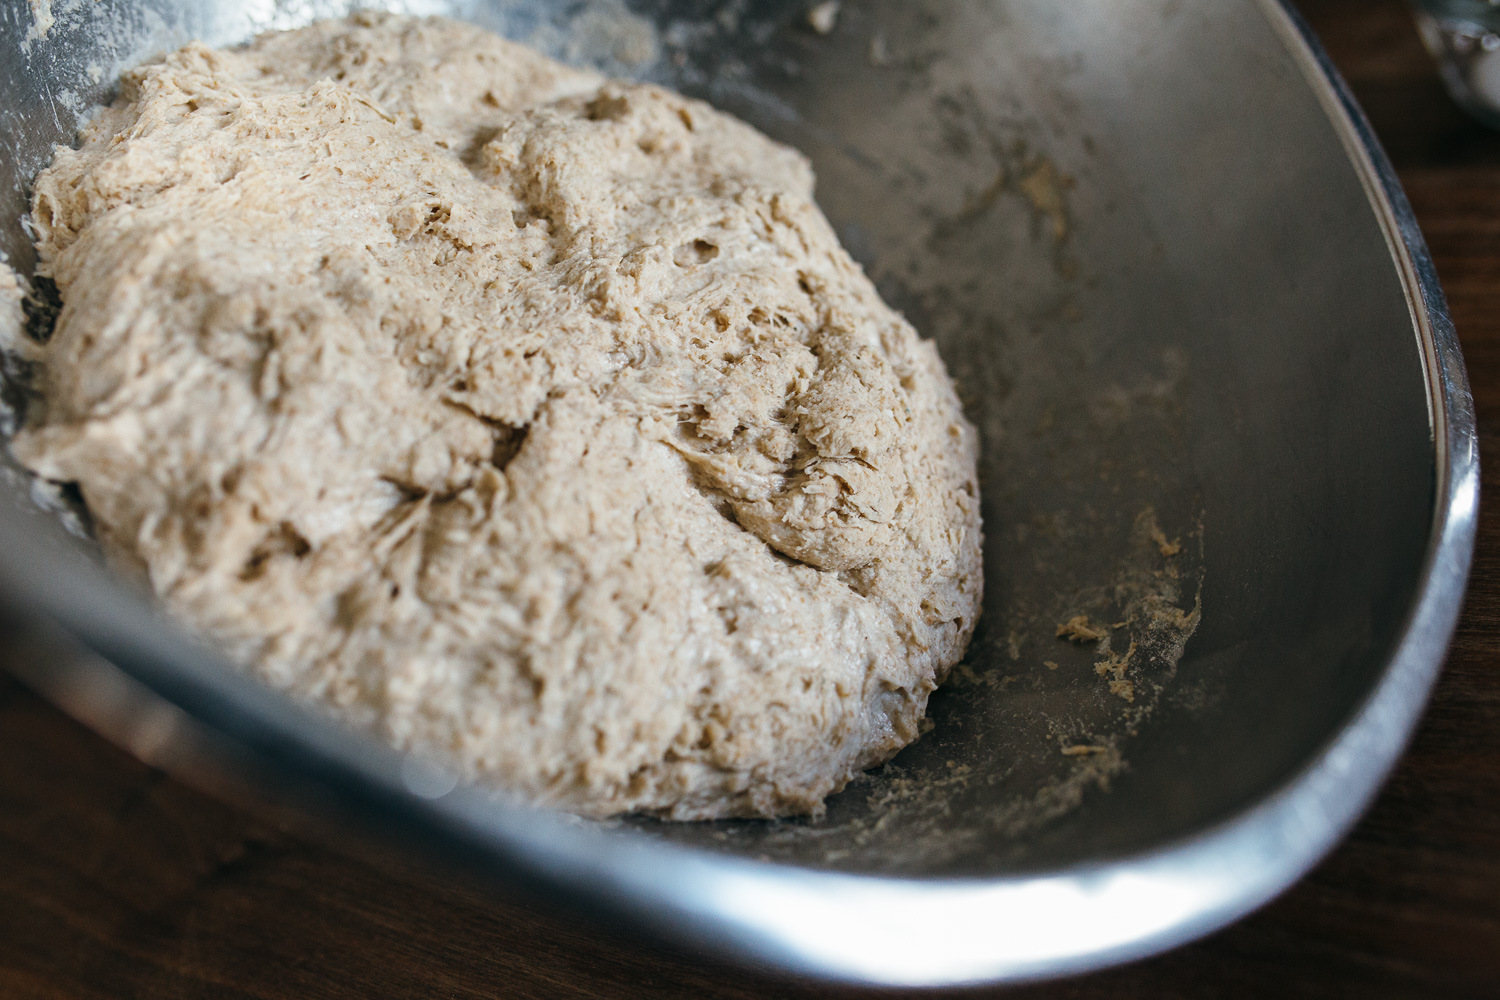
- ~1:20 PM – After letting the dough sit for about twenty minutes, knead the dough by folding inside the mixing bowl. Basically, take the top of one section, and fold it down over the bottom. Turn the bowl 90 degrees, and repeat. Continue to do this for 10 minutes. After ten minutes, you can take a small section of your dough and pull it apart gently. If it stretches thin without ripping, and you can see light through the dough, you have kneaded enough. If not, knead for another ten minutes. Cover with a damp towel and set a timer for one hour.
- After the hour is over, you’ll do a series of four folds, essentially repeating the kneading process above, one time around. You should do this more gently than when you kneaded the dough so you don’t knock much air out of the dough.
- Repeat this at stretch and fold at least three more times.
- ~5:20 PM – Check to see whether your dough is proofed correctly by pressing gently into the dough. If the dough quickly snaps back, your dough is not yet proofed enough. If it does not snap back at all, it is over-proofed (make a note of this for next time — not all is lost, but it will affect the quality of your dough). If it comes back, but slowly, your dough is proofed well.
- ~5:30 PM – Pre-shape and shape your dough after dividing into two roughly equal-sized loaves. I’m going to be completely honest here and say that I’m not very good at this yet. I have gotten better with practice, but it takes a bit of work to do this correctly. I also find that all written explanations of this process on the internet really suck. So, I’m going to link two videos that I’ve found VERY helpful in showing me how to do this right. My one piece of advice on this: DON’T SWEAT IT. This bread dough is actually a lot more forgiving than you think. Even if your loaves are little ugly ducklings, you’ll still come out with something delicious at the end.
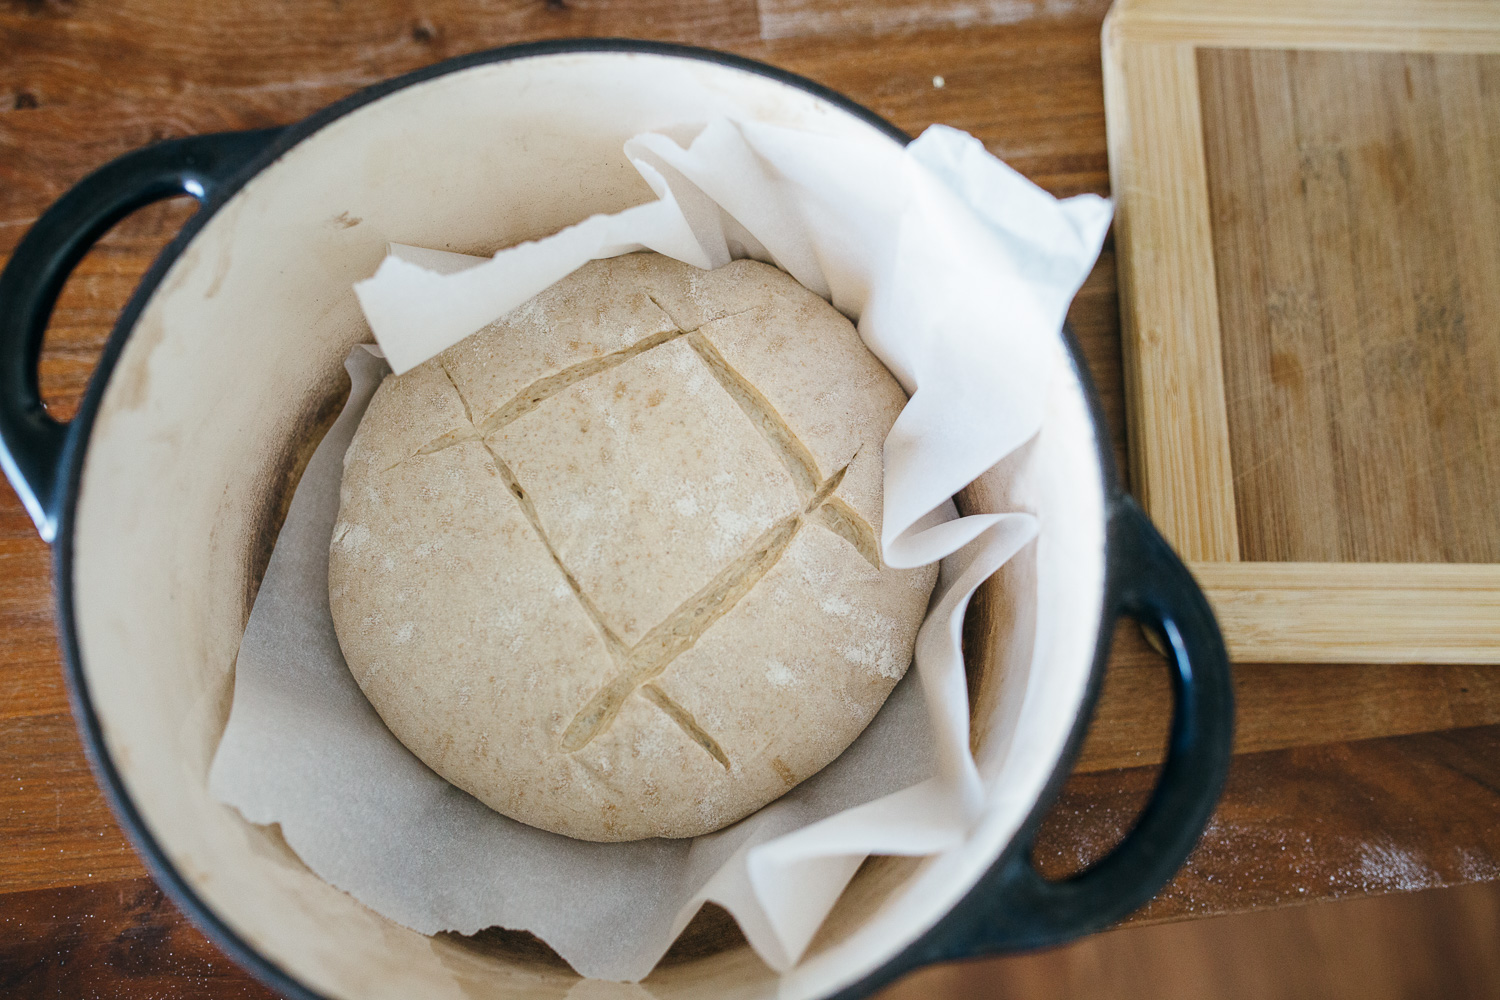
- After shaping is complete, you’ll need to chill in the fridge overnight. I use a couple of colanders lined with flour-dusted towels, but all the professionals use what’s called a “banneton.” Bannetons make your bread look pretty, but I’m not sure there’s much virtue in them. You could use a wicker basket or even just a regular bowl. I do think it’s important to have airflow, but that’s only based on research and not personal experience. Once you get the dough in the bowls (seam-side up!), pop them in the fridge. You’re done for the day!
Day 3 (morning)
- 8 AM – Preheat your oven to 500°. Once the oven is preheated, put in your dutch oven, lid and all for one hour before baking.
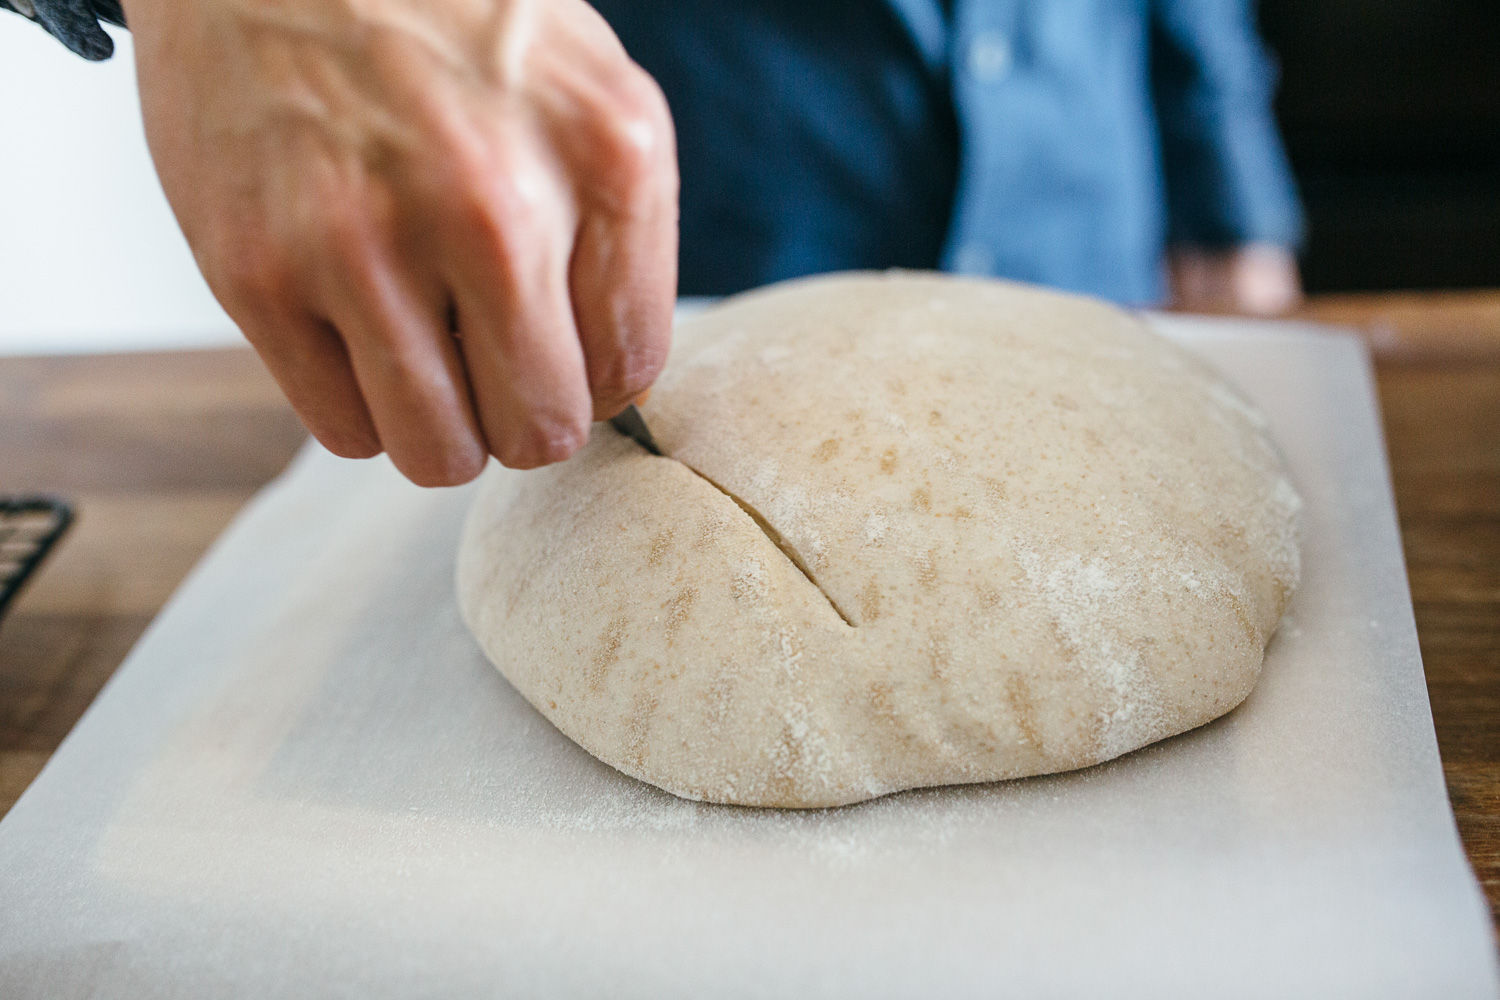
- 9 AM – Pull your first loaf out of the fridge. Flip over to a paper-covered cutting board — that’s why the seam-side is down. Score your bread by cutting a line or pattern into the top of the dough. You can use a “lame” (pronounced lahm), but I just use a razor blade. Pull out the dutch oven from the oven, transfer the paper with the dough on it to the dutch oven. Lower the temperature of your oven to 475°, and bake the bread with the lid on for 20 minutes. After twenty minutes, lower the temperature to 450°, remove the lid, and bake for another 20-30 minutes.
- Repeat the process for the second loaf.
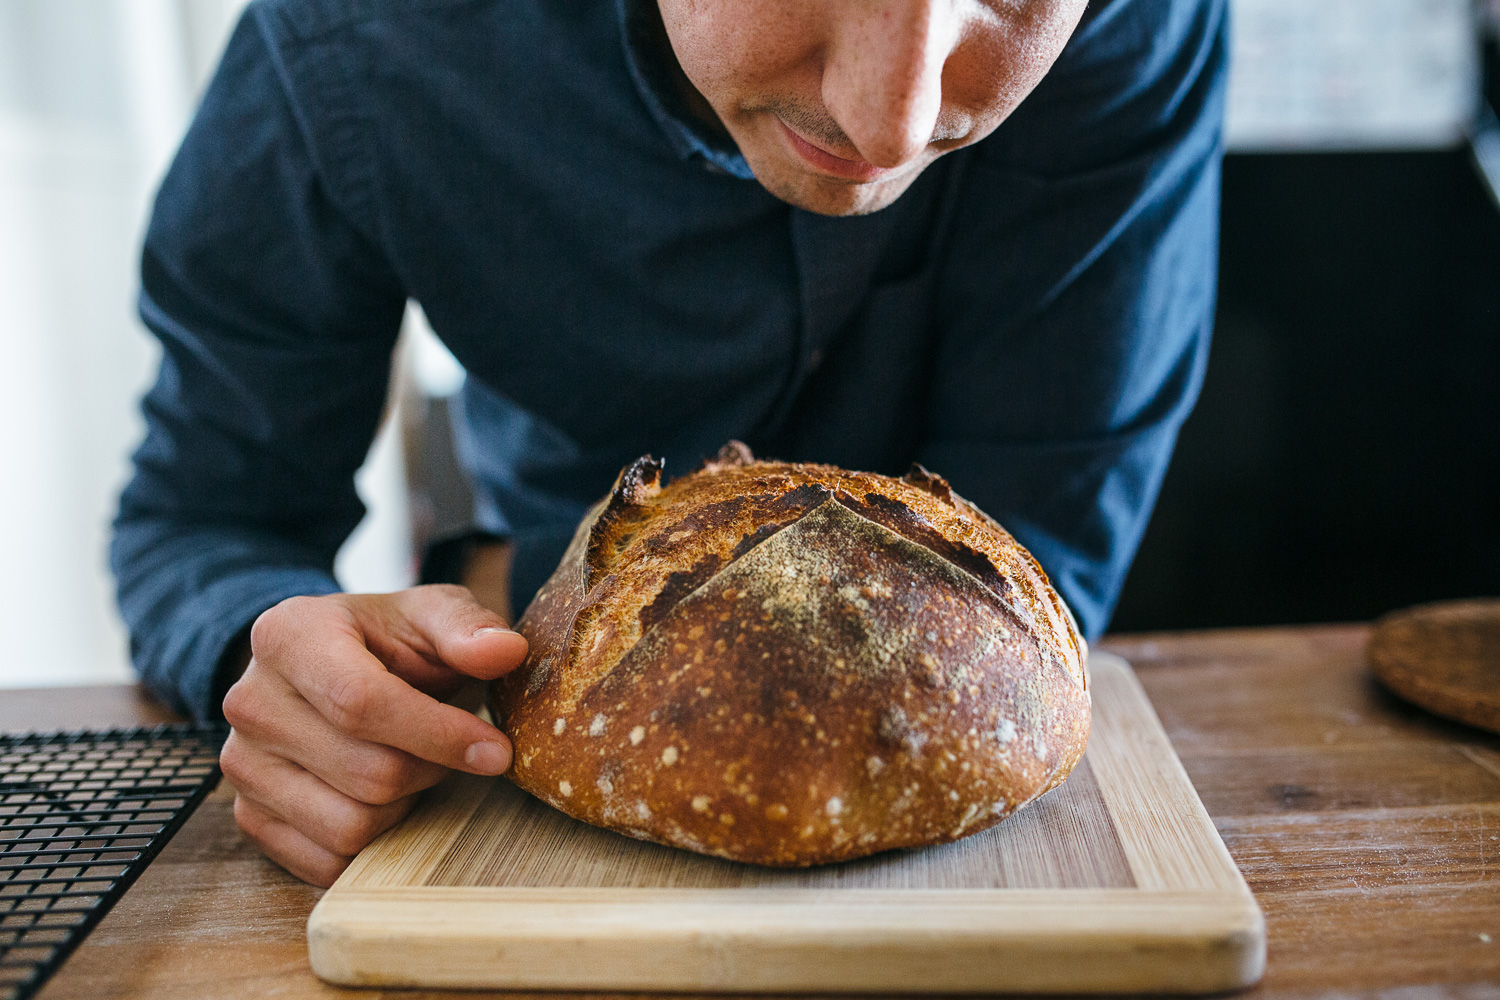
- Lovingly gaze upon your beautiful creation:
Whew! That’s a lot of steps. Ultimately, I suggest using more than this guide. Watch some of the videos I have provided, and maybe read through the links to recipes/starters/etc. that I’m putting in below. Also, if you want some pointers or advice, I’ll be glad to help any way I can 🙂
My favorite sourdough resources:
- The Perfect Loaf
- Making/Maintaining a Starter
- Beginner’s Sourdough Recipe (don’t be intimidated by the percentages)
- Bon Appetit
- Brad and Claire Make Sourdough (video that details the process in video form — also funny and helps to take the pressure off if you’re intimidated)
- NYT Cooking
- Claire Saffitz’s Sourdough (this is my baseline recipe, with some tweaks)
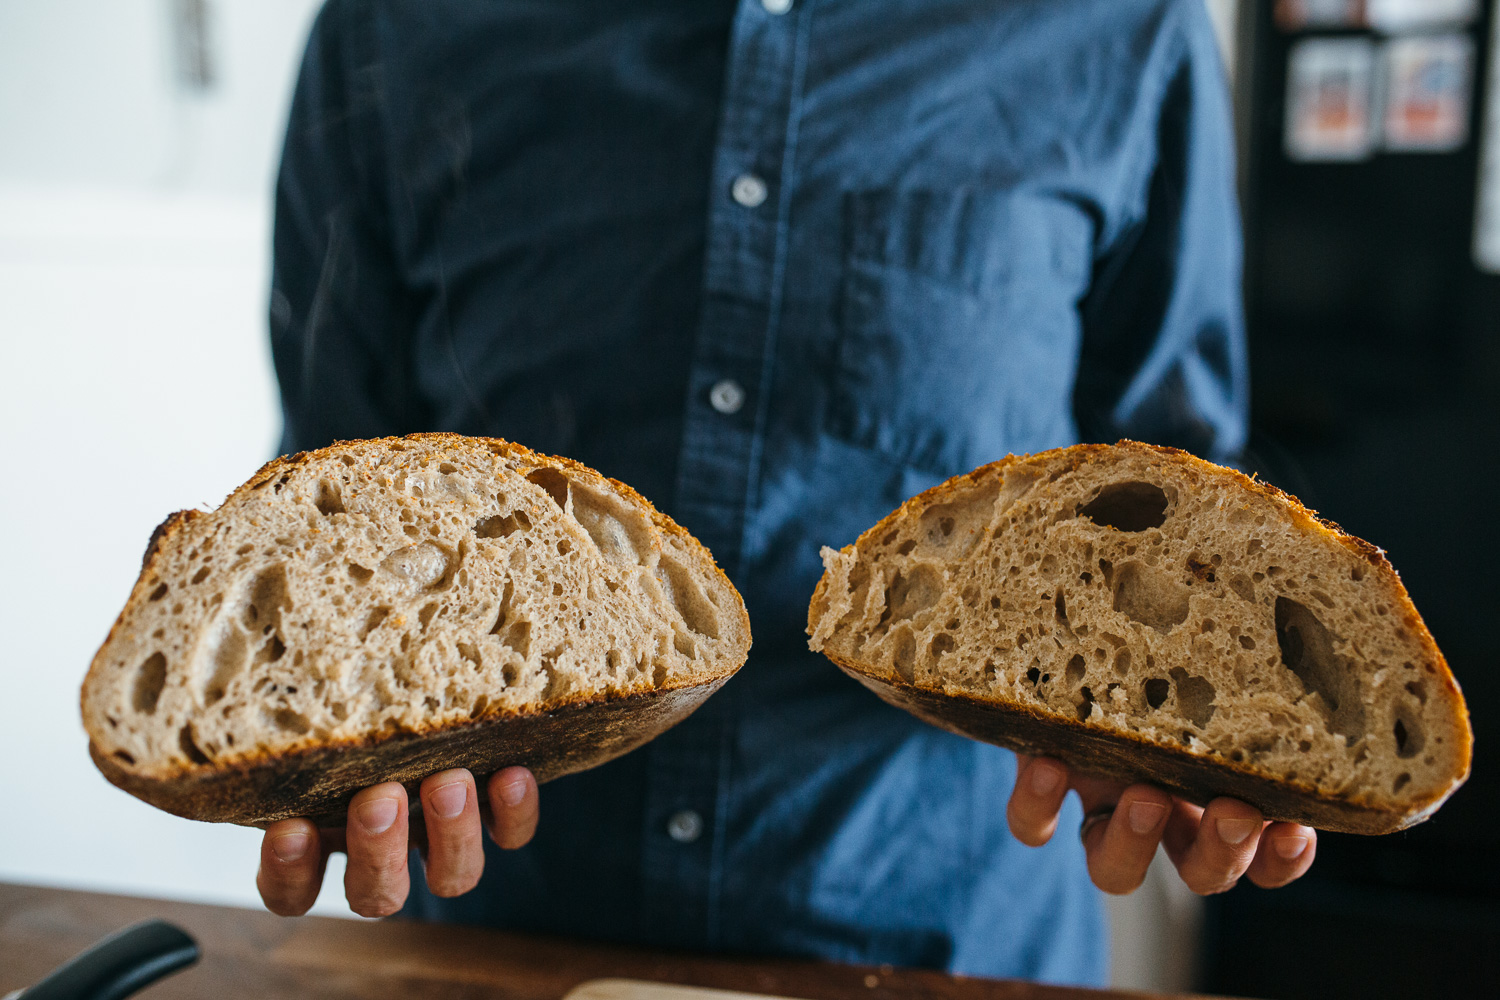
There is a TON of info out there if you’re at all interested in getting started. It can be pretty overwhelming. My best advice: just give it a shot. In my opinion, even a messed up homemade sourdough will beat store-bought sourdough any day of the week. There’s nothing like cutting into that first steamy loaf, with your house smelling like fresh bread.
I’m going to need a lot more instructions and videos and a lot more time! I love that you are trying new things. The grands need to have more than 1 piece each…you have to share son! ♥️